
Embellish This!
7 June 2010As a last hurrah before the new semester begins, I took out a plain white blouse that has been in my closet for months and embellished it with beads. I actually bought it for this purpose, but somehow I never got around to modifying it until now. As you can see from the “Before” photo, it really is just plain. Sure, it has some ruching here and there, but it was…. bleh. The idea also came from other clothes that I have and used to have. I have one white blouse with white beading on it, and I have another with a flower-shaped sequin-and-beads embellishment. I used to have a tank top with random colored wooden beads on it given as a Christmas gift (brand: Maldita), but I wasn’t girly enough to wear it at that time so I gave it away. The inspiration for the design came from “bib necklaces” which look really nice, but something I wouldn’t exactly pick out at a store. The collar’s shape on this particular blouse was perfect for that purpose. It practically screamed, “EMBELLISH ME!” and that’s exactly what I did.
BEFORE:

I took out the beads which I hardly used and the scrap ones that couldn’t be used for many other purposes, mixed them up (still considering the compatibility of colors, of course) and laid out a basic plan to follow. The giant red oblong ones are actually shells (not 100% sure if they’re colored capiz) from a necklace that I didn’t particularly like.
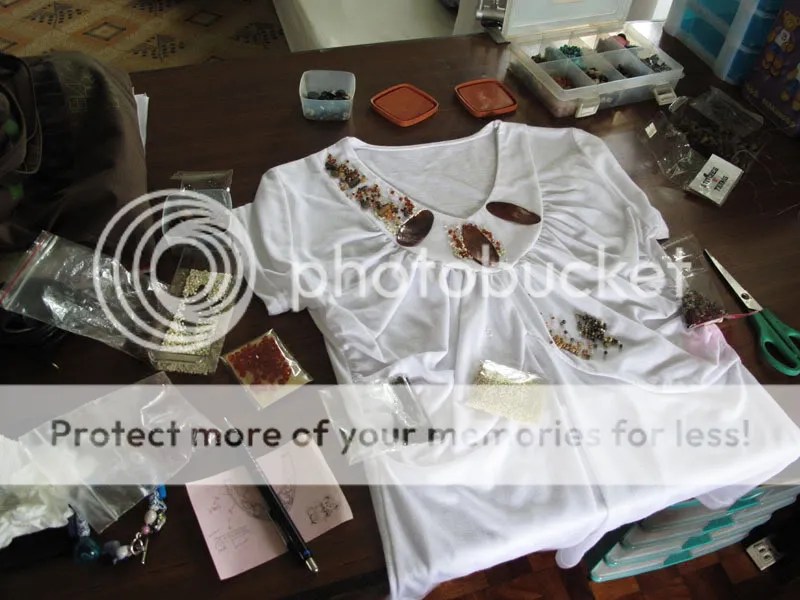
I also pulled out my very, very old stash of embroidery threads and searched for colors that matched some of the bigger beads. For everything else, I just used white sewing thread.

Read more to view how it progressed from BLEH to ![]() :
:
Stage 1: BLEH. It’s the reason why I’ve only used this blouse once.

Stage 2: MEH. This is the stage which my mother didn’t like what I was doing and would try her best to give constructive comments and not to say anything negative… to which I responded, “You don’t like it now but you’ll like it when I’m finished.” But in retrospect, yes, it really wasn’t looking good at this stage.

Stage 3: HMMMM… Added the bigger beads first.

Stage 4: HEEEEEEYYYYY (in a positive way)… Added orange and yellow “broken glass” beads for color

Stage 5: ![]() All the gaps have been filled in with a mix of wood, plastic, metallic and seed beads! My mom loves it now!
All the gaps have been filled in with a mix of wood, plastic, metallic and seed beads! My mom loves it now!

I tried it on at this stage, and found out 2 things:
- The knots formed by sewing all those beads are itchy.
- It’s a pain to take the blouse off.
#2 is only solvable by taking it off veeeeeeeery carefully. #1, though, required a bit more sewing.
Here’s the problem: itchy, irritating knots galore.

Here’s the solution: I made a pattern of the collar shape and cut out a piece of cloth (from old stash, of course) with about 1cm allowance, turned the blouse inside-out and whip-stitched the cloth to cover the itchy knots.

Tadaa~! It’s finished! No more itchy, irritating knots!

Here’s a detail of the beads:

Yay! I’m finally finished! I wasn’t able to use up all the beads, but I’m sure I’ll find some other project for that. I don’t need a necklace for this one! After almost three days of work and a great number of needle and pin wounds, I’m very satisfied with it. I think it looks lovely. What do you think?


[…] Here it is! I finished my sewing project in about 2 days (done in a span of 3 days, though). I love it! I’ll definitely use this blouse a lot more… but first it needs a spin in the laundry. See how it was made in Ang Craftista! […]
ANG GANDAAAAAAAAAAAAAAH!!!!!!!!! (woot)(woot)(woot)
thanks, dear (cozy)